How to Take a Passport Photo With iPhone
The State Department cares about the 2 x 2 frame, the background and whether the picture has been altered. Here is how to shoot and crop one on an iPhone.
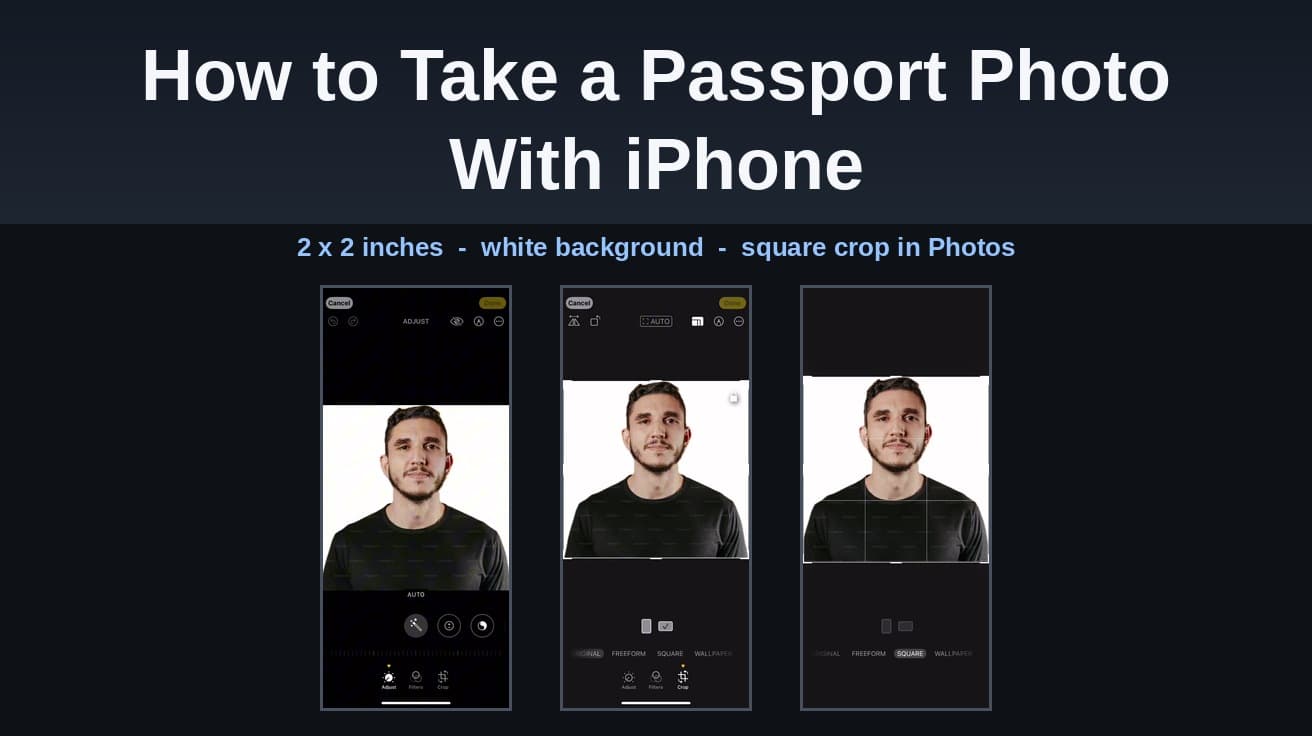
To take a passport photo with iPhone, stand about two feet in front of a plain white wall in even daylight and have someone else hold the phone at eye level, roughly four feet away. Then open the shot in Photos, tap Edit, tap Crop, choose SQUARE and tap Done. Do not run it through a filter, a background remover or any AI clean-up tool.
The U.S. Department of State does not care what camera you used. It cares about the size of the frame, the background behind you, the light on your face, and whether the picture has been altered after the fact. A current iPhone clears the resolution bar without effort, so the rejections almost always come down to the other four.
What the State Department requires
The photo must be a single colour photo taken in the last six months, measuring 2 x 2 inches (51 x 51 mm). Your head, measured from the bottom of the chin to the top of the head, must fall between 1 and 1 3/8 inches (25 to 35 mm). In a 2-inch frame that puts your head at roughly half to two-thirds of the height.
The background has to be white or off-white, with no shadows, texture or lines. Lighting on your face must be uniform; photos that are overexposed, underexposed, or lit from overhead so that shadows fall across the face are not accepted. Face the camera squarely without tilting your head, keep a neutral expression with both eyes open and your mouth closed.
Glasses come off, including tinted ones, unless you have a signed doctor's note. So do hats and head coverings, except religious attire worn daily in public or a medical covering, each of which needs a signed statement. No uniforms, nothing that looks like a uniform, no camouflage, and no headphones or wireless earpieces. Jewellery and piercings are fine if they do not hide your face.
One rule matters more than the rest for a passport photo shot on a phone: the department's instruction is not to change your photo using computer software, phone apps or filters, or artificial intelligence.
How to take a passport photo with iPhone
1. Find a plain white or off-white wall and stand one to two feet in front of it. Standing too close throws your own shadow onto the background, which is one of the listed reasons a photo fails.
2. Face a window. Soft, indirect daylight across the front of your face gives the uniform lighting the rules ask for. Turn off the room's overhead light if it is casting shadows under your eyes and nose.
3. Open Camera, stay in Photo mode and use the rear camera. Switch the flash off. If your iPhone offers Photographic Styles, set it back to Standard first, under Settings, then Camera, then Photographic Styles. A style is baked into the file when the shutter fires and cannot be peeled off later, which makes it exactly the kind of alteration the rules prohibit.
4. Ask someone else to take the picture from about four feet away, holding the phone at your eye level so the lens is square to your face. The department does not publish a rule against selfies, but an arm's length puts a wide lens close to your face, which distorts your proportions and makes the head-height range hard to hit. If you are on your own, prop the phone on a shelf at eye level and use the timer.
5. Neutral expression, eyes open, mouth closed, glasses off. Take several frames so you have something to choose from.
Crop the photo to a square in Photos
1. Open the photo in the Photos app and tap Edit. The editing tools appear in a row along the bottom: Adjust, Filters and Crop.
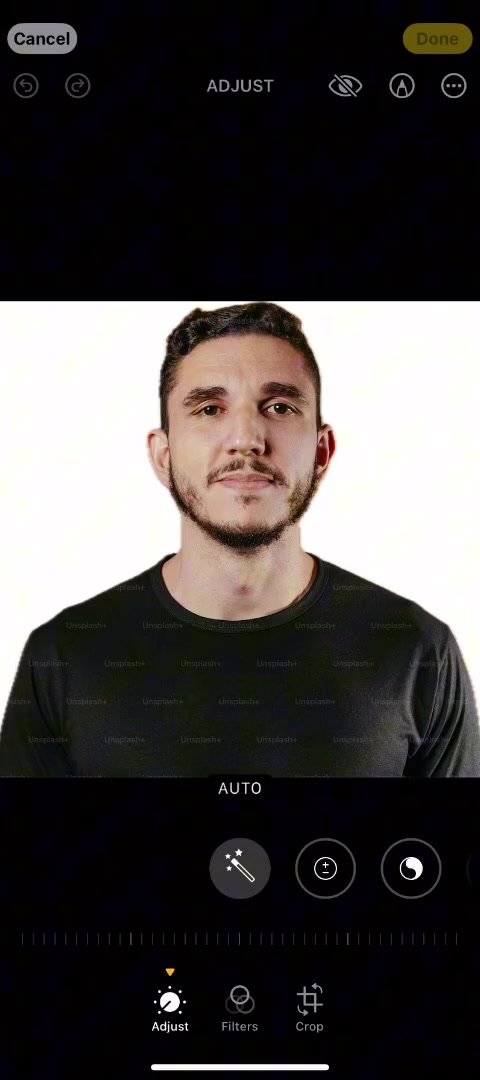
2. Tap Crop. The crop frame appears around the photo, with rotate and flip controls above it and a straightening dial below.
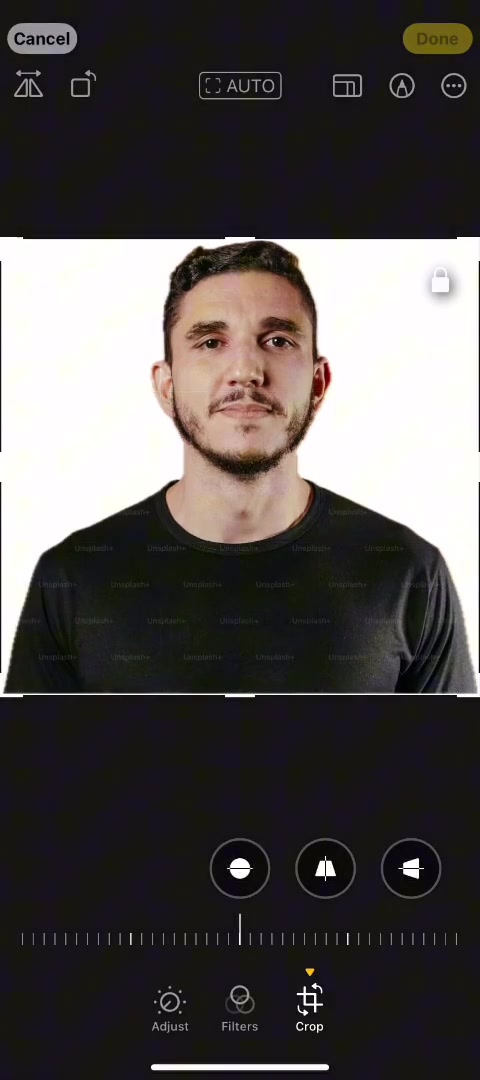
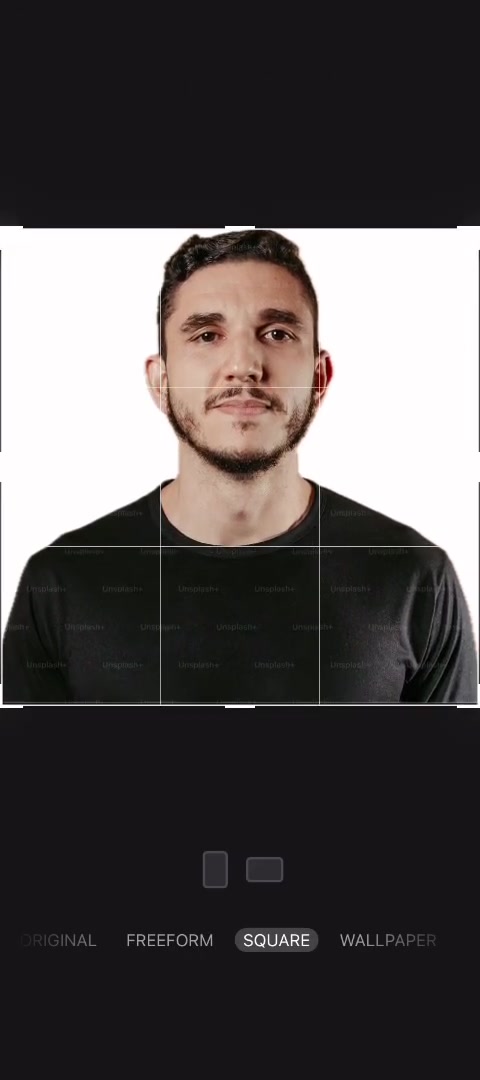
3. Tap the aspect ratio button in the toolbar at the top. A row of preset ratios appears above the Adjust, Filters and Crop tabs: ORIGINAL, FREEFORM, SQUARE and WALLPAPER.
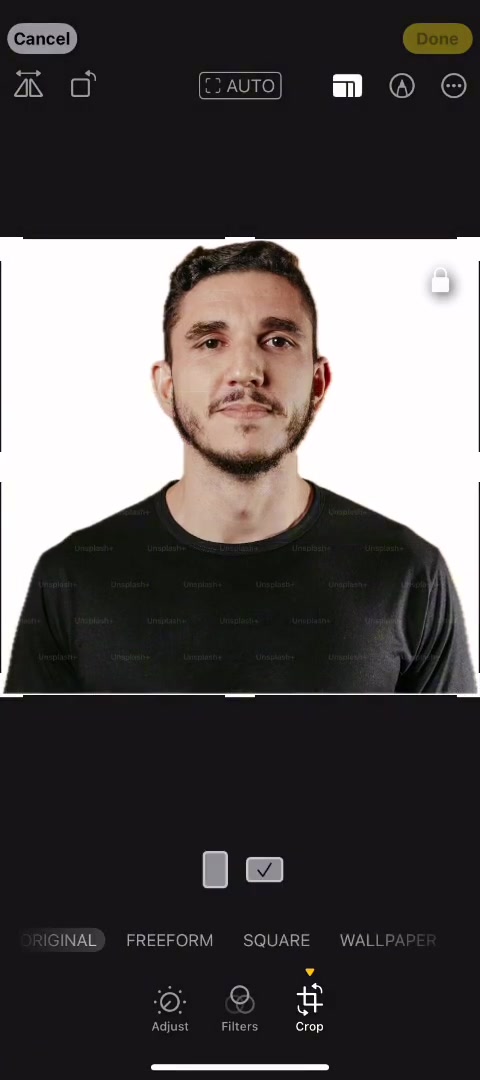
4. Tap SQUARE. The frame locks to 1:1. Drag and pinch the photo inside it until your head and the top of your shoulders are centred, with your head filling between half and two-thirds of the frame height and a little space above your hair. Tap Done.
Printing it and uploading it
If you are mailing a paper application, the photo has to be printed at 2 x 2 inches on matte or glossy photo-quality paper. Photocopies and scans are not accepted, and neither are prints with holes, creases or smudges. Most pharmacy photo counters will print a 2 x 2 from a file, or you can run it off at home if you have photo paper and a printer connected to your iPhone.
If you are renewing online, the renewal page says you upload an original digital photo in .JPEG format. The department's published digital image specification, which covers photos submitted electronically, is tighter than that: a square image between 600 x 600 and 1,200 x 1,200 pixels, full colour at 24 bits per pixel in sRGB, saved as a JPEG of no more than 240 KB. A square crop straight off an iPhone will be far larger than 1,200 pixels and well over 240 KB, so it will need scaling down.
That sits awkwardly next to the instruction not to change your photo with software, and the department does not spell out where the line falls. The safest reading is that cropping and resizing are part of meeting the 2 x 2 format, while retouching, filters and background replacement are what the rule is aimed at.
What this does not do
A square crop does not make the passport photo compliant. It fixes the shape and nothing else; head height, background, shadows and expression are all still on you. The State Department's photo page does not offer a tool that checks your picture before you submit it, so nothing on the phone will tell you whether it will pass. Nor does cropping get you out of the printing requirement: a perfect square on screen is not an acceptable photo for a mailed application until it is printed at the right size on the right paper.
Common questions
Can I use the iPhone's background removal to get a white background? No. Lifting the subject out and dropping it onto white is exactly the software alteration the rules prohibit, and the cut-out edge around hair is visible on inspection. Find a real white wall.
Can I reuse a photo from last year? No. The photo has to have been taken within the last six months, and it should look like you do now.
What about a baby or a small child? The same 2 x 2 frame and plain background apply, though the department allows for a baby's eyes not being entirely open. No one else can appear in the frame, including a hand supporting the child.
If SQUARE is not in the list
Check that you are actually in Crop rather than Adjust or Filters, then look for the aspect ratio button in the top toolbar: the preset row only appears once you tap it. On older versions of iOS the ratio list sits at the top of the crop view instead of the bottom, and the wording is the same.
If you have already cropped the photo the wrong way, nothing is lost. Open it again, tap Edit, then tap Revert to return to the original frame and start from the aspect ratio button.